Key Takeaways
- Plan the locations, not the camera settings. The single most important decision is where you point the lens and when — canyon overlook at sunset, reservoir at sunrise, petroglyphs in shade. Get the where-and-when right and the images follow.
- Vernal’s edge is variety in a small radius. Grand landscape, legible geology, accessible rock art, dark night skies, and alpine forest sit within about an hour of one basecamp — few photo destinations offer that range.
- Two nights beats one for most trips. A Friday-evening arrival plus two days gives you two sunrises, two sunsets, and time to work more than one location without a rushed, drive-heavy weekend.
- Balance the light across the day. Reserve sunrise and sunset for your headline landscapes, and use harsh midday for petroglyphs, forest, museums, scouting, and driving — subjects that don’t need golden light.
- The best photo spots are the best sightseeing. A national monument, scenic byways, and reservoirs keep non-photographers happy while you shoot — this is why a Vernal photography weekend works for couples and mixed groups.
- Verify the moving parts. Sunrise and sunset times, foliage and bloom, road and trail conditions, closures, permits, drone and dark-sky rules, hours, and fees change and are set by the agencies — confirm current specifics for your exact dates.
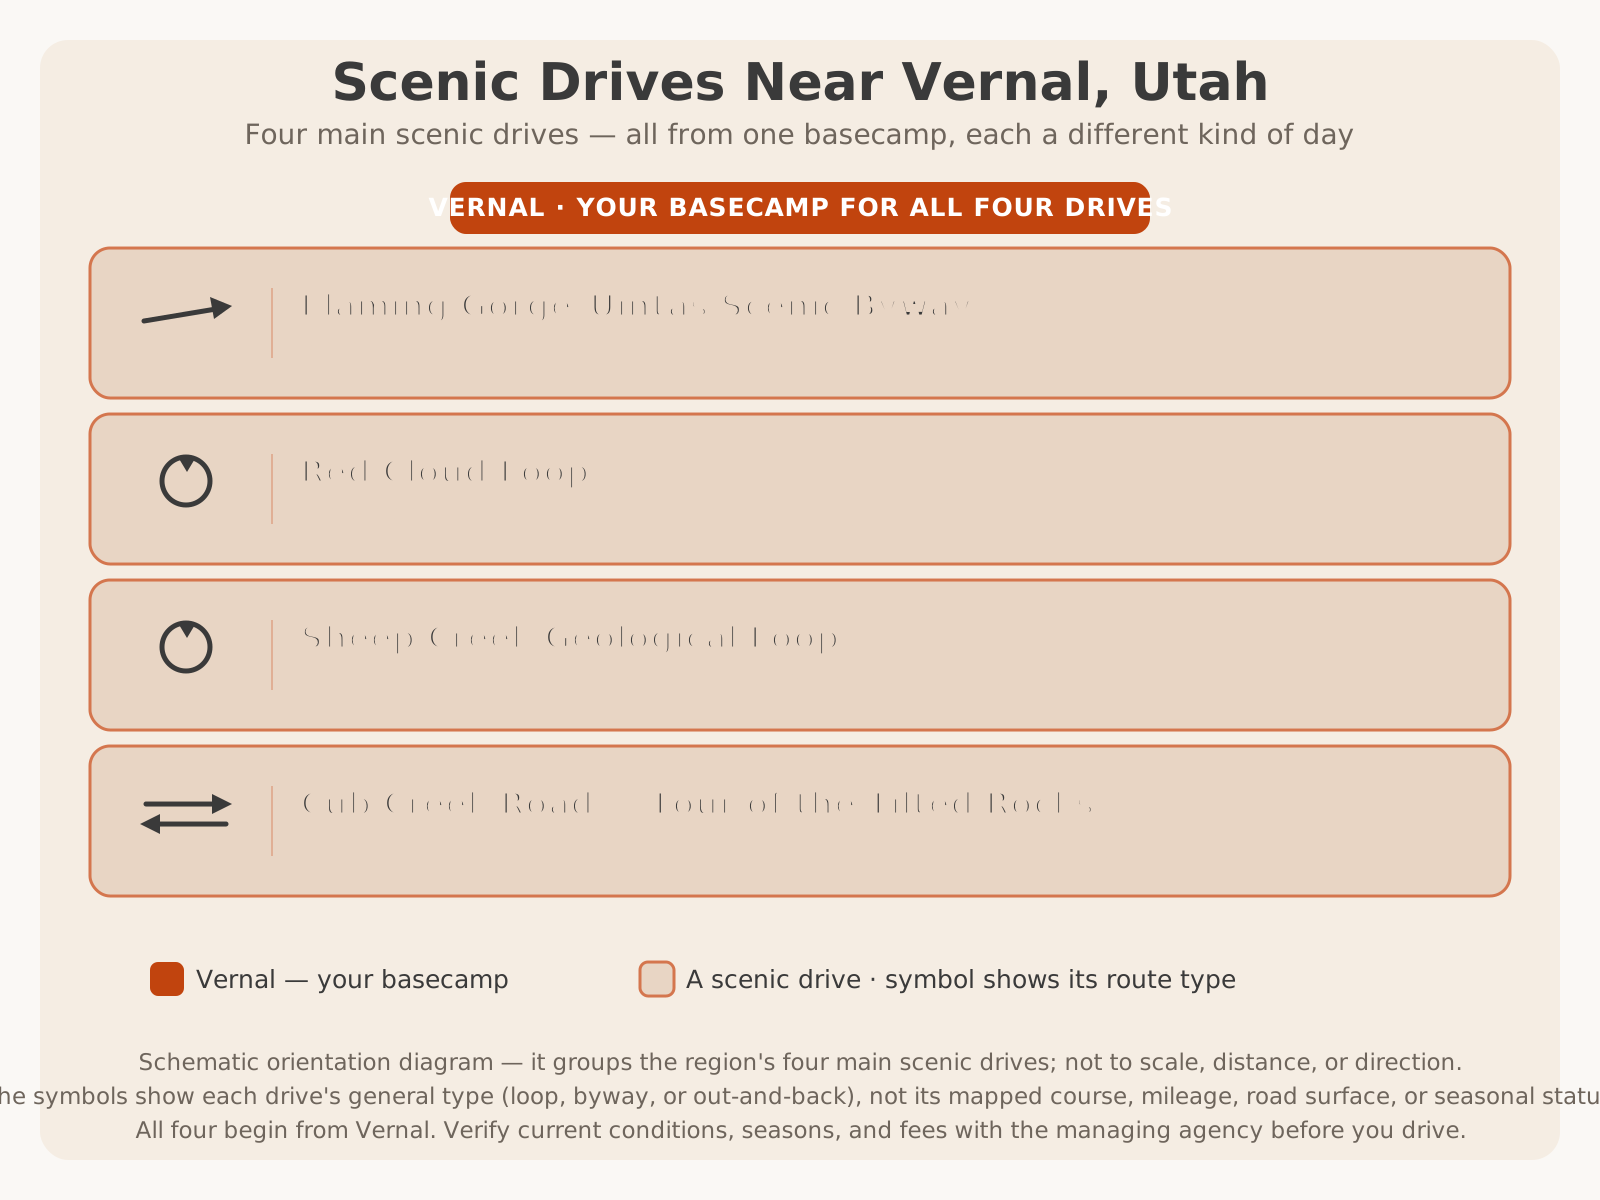
A photography weekend leans on the region’s scenic drives — here are the four main routes a couple of days can chain for light and landscapes, all from one Vernal base:
Why Vernal Is a Great Photography Destination
Plenty of places have one great view. What makes Vernal worth a whole photography weekend is that it has several completely different kinds of great subject within a short drive of a single, comfortable basecamp — and that changes how you plan. You’re not building a trip around one overlook and hoping the light shows up; you’re choosing from a genuinely varied menu of landscapes and matching each one to the hour and the season that flatter it.
Think about the range. To the north, Flaming Gorge is a vast reservoir of red-rock canyons and deep blue water, laced with overlooks along the Flaming Gorge–Uintas Scenic Byway — the kind of grand, wide-open landscape photographers drive across states for. Just south and east, Dinosaur National Monument is a geology photographer’s classroom: tilted rock layers, river canyons, and the famous Wall of Bones where real dinosaur fossils sit in the rock. Along Cub Creek Road, some of the most accessible petroglyph panels anywhere give you a cultural and historical subject you can reach without a hard hike. Closer to town, Red Fleet’s sandstone fins and Steinaker’s calm water offer red rock and reflections minutes from your hotel. And up in Ashley National Forest, the High Uintas add alpine forest, lakes, and cooler light. That’s landscape, geology, water, cultural history, and mountain scenery — plus some of the darkest night skies in the country — inside one weekend’s reach.
The second reason is that Vernal is an easy basecamp. The town sits at the center of the region like a hub, so you unpack once and drive out to whichever location suits the light and the day. There’s no chasing lodging around the region or repacking every morning — you shoot the sunrise location, come back or move on, and set up for sunset somewhere else. For a short trip where light is everything, that low-friction rhythm lets you spend your energy on the photography instead of the logistics.
The third reason is the quality of the light and the air. This is high-desert and mountain country — clean air, big skies, strong directional light at the edges of the day, and dramatic weather that can turn an ordinary overlook into a portfolio frame. Away from town, the darkness at night is a genuine resource for astrophotography. None of that is guaranteed on any given day, which is the whole point of planning: you stack the odds by picking the right location for the right hour and season, and by giving yourself enough time for the light to cooperate. Because so many specifics — access, road conditions, closures, night-access rules, dark-sky designations — are set by the managing agencies and change, always VERIFY WITH OFFICIAL SOURCE before you build a shoot around a particular place or time.
Who This Weekend Is Best For
The honest first question isn’t how to plan this weekend but whether it’s the right trip for you — and for most kinds of photographers, the answer is yes, because the region flexes so well. Here’s who tends to love it, and how each should think about the weekend.
Landscape photographers are the core audience and get the most obvious payoff: canyons, reservoirs, byway overlooks, and alpine scenery, all with strong light at the edges of the day. For you, the planning is about matching each location to sunrise or sunset, scouting compositions in advance, and leaving slack for weather and light to turn in your favor.
Geology and history photographers come for the tilted rock, the Wall of Bones, the layered canyons, and the accessible petroglyph panels — subjects that are legible, unusual, and often best in softer or shaded light rather than golden hour. For you, the weekend is less about chasing sunrise and more about working detail, texture, and story.
Night-sky and astrophotographers come for the darkness. For you, the planning revolves around moon phase, clear weather, a foreground worth including, and — critically — confirming where you’re actually allowed to be after dark. This is the interest that most rewards a spare day for the sky to cooperate.
Wildlife photographers get varied habitat from high desert to alpine forest. For you, success is a matter of patience, distance, ethics, and luck rather than a fixed schedule — wildlife is never guaranteed, and the region’s value is the range of habitat rather than any promise of a sighting.
Couples and mixed groups — where one person is the photographer and others simply want a beautiful weekend — are among the best served here, because the best photo locations are the best sightseeing. Pair this with our romantic weekend framework if that’s your group.
Weekenders from the city — visitors driving in from Salt Lake City (about three hours) or from Colorado — treat this as an achievable escape rather than an expedition. For you, the planning centers on protecting shooting time by handling the drive at the edges of the weekend and not over-scheduling the days on the ground.
If you’re some blend of the above — most photographers are — that’s fine. The whole point of this guide is that a single well-planned weekend can serve several of these interests at once, as long as you lead with one.
Planning Your Photography Weekend
This is the heart of the trip, and it deserves real thought before you book anything. Planning a photography weekend is different from planning an ordinary getaway: your schedule bends around light, not around opening times or mealtimes. Get the structure right and everything else falls into place. Here’s how to think about it.
Start by choosing your primary interest. Before you pick a single location, decide what excites you most — grand landscape, geology and history, night sky, wildlife, or simply a beautiful mixed weekend. That one choice narrows a big region into a manageable shortlist and tells you which hours matter most. Trying to be all five kinds of photographer in two days is the fastest way to a weekend of driving and thin results.
Then choose two or three locations, not ten. The region’s variety tempts people into a frantic checklist. Resist it. A weekend has room to work two or three locations well — enough to catch each in good light and to revisit if the first attempt disappoints. Depth beats breadth on a short trip, and a location shot in great light beats five shot at noon.
Build the days around the edges of the light. The strongest landscape light comes at sunrise, sunset, and the blue hours on either side; the harsh middle of the day is for other things. So plan backward from those windows: pick a sunrise location and a sunset location, and fill the midday with subjects that don’t need golden light (petroglyphs, forest, canyon shade, the museum, driving, scouting). This single habit does more for a photography weekend than any gear.
Scout before you shoot. Use arrival evening and midday hours to scout the compositions you’ll shoot in good light — find your spot, your angle, and your foreground while the light is flat, so that when it turns golden you’re set up and calm rather than scrambling. The overlooks along the scenic byway and Red Cloud Loop are ideal for this.
Leave slack for the light and the weather. The best frames often come from patience — waiting out a cloud, coming back the next morning, letting a storm break. Don’t pack the days so tight that a slow sunrise ruins the schedule. A weekend built with breathing room is a weekend that can seize a great sky when it appears. Because sunrise and sunset times, road access, and conditions change and are set by the agencies and the season, VERIFY WITH OFFICIAL SOURCE and check a current almanac for your exact dates.
Choosing Locations by Interest
The single most useful planning move is to match locations to what you actually shoot. Here’s the honest breakdown of what the region’s headline places do best.
| Landscape | Wildlife | Geology & History | |
|---|---|---|---|
| Signature locations | Flaming Gorge canyons & overlooks, the scenic byway, reservoirs, the High Uintas | Varied habitat across high desert, canyons, and alpine forest | Dinosaur National Monument’s tilted rock & Wall of Bones, Cub Creek petroglyphs, Sheep Creek geology |
| Best light | Sunrise, sunset, blue hour; dramatic storm light | Early morning and late evening, when animals move | Soft, shaded, or overcast light for texture and detail |
| Pace | Chase the edges of the day; scout midday | Slow, patient, opportunistic — no fixed schedule | Flexible; workable in the harsher midday hours |
| Reach these via | Scenic drives, photography hikes | Wildlife hikes, bird watching | Dinosaur National Monument, Sheep Creek loop |
| Key caution | Weather and light aren’t guaranteed — build in slack | Never bait, crowd, or stress wildlife; keep your distance | Stay on trails; never touch or chalk rock art |
Friday Arrival
Friday is arrival, scouting, and one easy sunset — not a full shooting day — and planning it that way is what makes Saturday great. If you’re driving in from Salt Lake City or Colorado, the day is mostly road, so the goal is to land well, get oriented, and set yourself up for a productive early Saturday.
Do the orientation that a photography trip needs. Check into your lodging in Vernal, then spend the remaining daylight scouting rather than chasing. Drive out toward the location you’ve chosen for tomorrow’s sunrise, find your composition and your parking, and note how long the drive actually takes in real conditions — that timing is what lets you leave in the dark with confidence. Check the weather for the weekend (skim the Vernal weather guide for the season), look up sunrise and sunset times for your exact dates, and, if the night sky is on your list, check the moon phase.
Use the evening to make your final plan and prep your gear. Lock in tomorrow’s shape: your sunrise location and departure time, your midday sightseeing, and your sunset spot. Charge every battery, clear and format your cards, clean your lenses, and stage your bag by the door so a pre-dawn start is calm rather than frantic. If you’re doing astrophotography, this is the night to confirm exactly where you’re allowed to be after dark — night access to some sites is restricted, so never assume. VERIFY WITH OFFICIAL SOURCE.
If you arrive with daylight and energy, an easy Friday sunset close to town — the water and red rock at Steinaker or Red Fleet, both minutes away — is a lovely, low-commitment way to start and to test your settings before the bigger locations. But it’s genuinely optional. A calm Friday night and an early Saturday will do more for your weekend than a tired, rushed first shoot. Grab an easy dinner in town, confirm the plan, and turn in. For a full checklist, see our what to bring guide.
Saturday Photography Plan
Saturday is the heart of the weekend, so plan it around the edges of the light — a strong sunrise, a productive midday of non-golden subjects, and a strong sunset — with your primary interest driving the choices. Here are the three shapes a great Saturday takes.
The landscape-led Saturday. Be at your headline location before first light — a Flaming Gorge overlook, a reservoir for calm-water reflections, or a byway viewpoint you scouted Friday. Shoot the blue hour and sunrise, then, as the light hardens, move to midday-friendly subjects: the Wall of Bones and the tilted-rock formations at Dinosaur National Monument, the shaded petroglyph panels along Cub Creek, or a stretch of the scenic byway for scouting. As the day cools, set up early for a sunset at a west-facing canyon or overlook, and stay for the blue hour after — often the best frame of the day.
The geology-and-history Saturday. If layered rock and cultural subjects are your thing, midday isn’t wasted time — it’s prime time. Spend the strong-light hours where soft or shaded light helps: inside the monument, along Cub Creek Road’s tilted rocks and petroglyphs, or on the Sheep Creek Geological Loop, where the exposed rock tells a legible story. Bracket your day with a sunrise and sunset at a grand overlook for contrast, but let the middle of the day carry the real work.
The mixed / with-non-photographers Saturday. If you’re traveling with people who don’t shoot, put your light-sensitive photography at the edges — a solo or quiet sunrise while others sleep, a sunset before or after dinner — and share the midday. A visit to the monument, an easy photography hike, a scenic drive, or a swim at the reservoir keeps everyone engaged while still handing you good frames. This is the single best way to keep a mixed group happy: nobody waits in the car, because the places you want to photograph are the places they want to see.
If astrophotography is on your list and the sky is clear, Saturday night is your chance: head away from town lights to a location you’ve confirmed you can access after dark, include a strong foreground, and shoot the stars. Otherwise, keep the evening simple — an unhurried dinner in town, a review of the day’s take, and an early night that sets up a relaxed Sunday. If you’re camping — at Red Fleet, Steinaker, or Flaming Gorge — you’re already positioned for both the night sky and the next sunrise, which is half the reason photographers camp here.
Sunday Photography Plan
Sunday is the day the weekend earns its variety, and the smart move is to decide its character based on how Saturday went and what you still want in the frame. You have three good directions, and all make a strong last day.
Option A — chase a different subject or location. If Saturday was grand landscape, give Sunday morning to geology and history — the monument, the petroglyphs, the Sheep Creek loop. If Saturday was detail and rock, spend Sunday’s first light on a big overlook you haven’t shot yet. The goal is to come home having captured the region’s range, not five versions of the same frame. Keep it to a morning session so you’re not shooting against the clock before the drive home.
Option B — revisit and improve. Often the better call: if a location on Saturday almost worked — the light was close, the composition nearly there — go back Sunday morning and nail it. Photographers frequently get their best frame on the second visit, when they know exactly where to stand and what they’re waiting for. A weekend that revisits one great location in better light usually beats one that adds a mediocre new one.
Option C — trade shooting for the experience. Especially for couples and mixed groups, give the last morning to simply enjoying the place: an easy hike, a slow scenic drive, the town’s attractions, or a guided backcountry UTV tour — the region’s signature adventure, and a way to carry a camera into canyon country, arches, and remote rock art you couldn’t otherwise reach, with owners Dave and Trudy handling the driving and the storytelling. See backcountry tours for what it covers. It’s the ideal shared finish that still hands a photographer frames they can’t get anywhere else.
Whichever you choose, protect the drive home: from Vernal it’s about three hours over the mountains to Salt Lake City, so leave with daylight to spare, fuel up before you go, and check current road and weather conditions. Day-use fees, park and monument hours, road access, and any closures change and are set by the agencies — VERIFY WITH OFFICIAL SOURCE before you build the morning around any single stop.
Sample Weekend Timeline
Every photographer’s weekend looks a little different, but a realistic two-night shape helps you see how the pieces fit around the light. Treat this as a skeleton to adapt, not a schedule to obey — the whole point is that Vernal lets you swap locations and subjects freely as the weather and light dictate.
| Landscape-first photographer | Mixed / with non-photographers | |
|---|---|---|
| Friday PM | Arrive, scout tomorrow’s sunrise spot, easy close-to-town sunset, prep gear | Arrive, settle in, easy dinner in town, plan the light windows |
| Saturday dawn | Sunrise at a Flaming Gorge overlook or reservoir | Optional quiet sunrise for the photographer; others rest |
| Saturday midday | Monument, petroglyphs, byway scouting in harsh light | Shared: Wall of Bones, easy hike, or a scenic drive |
| Saturday PM | Set up early for a canyon or overlook sunset + blue hour | Relaxed sunset near town; dinner together |
| Saturday night | Astrophotography if the sky is clear (confirmed access) | Campfire or early night |
| Sunday AM | Different subject, or revisit Saturday’s best spot | Sightseeing: monument or a scenic drive; optional UTV tour |
| Sunday midday | Lunch in town, then drive home with daylight | Easy hike or town, then head home |
Packing Tips
You’re driving, not flying, so pack thoroughly — the region’s conditions reward it, and the gap between a great shooting day and a frustrating one is often a dead battery, a full card, or a forgotten layer. This is a planning checklist, not a gear tutorial; match your actual kit to the photography you’ve chosen.
- Your camera kit, matched to your interest — the lenses your chosen subjects need (wide for landscape, longer for wildlife and detail, a fast lens for night sky), plus lens cloths for high-desert dust.
- A sturdy tripod. Non-negotiable for sunrise, sunset, blue hour, and astrophotography — most of the best light here is low light. Confirm tripod rules for any specific indoor or protected site. VERIFY WITH OFFICIAL SOURCE.
- Far more batteries and cards than you think. Cold mornings drain batteries fast and long-exposure night work eats power and storage; bring spares and keep them warm.
- A headlamp or two for pre-dawn hikes to a location and for night-sky work — hands-free light you can dim to protect your night vision.
- Far more water than you think you’ll need, plus extra in the car. Dehydration is the region’s most common real hazard, and shade is scarce on open overlooks.
- Sun protection — a brimmed hat, sunglasses, high-SPF sunscreen, and light long sleeves. Sun at this elevation is fierce, and you’ll be out in it at midday scouting.
- Layers and a rain shell. High-desert and mountain weather turns quickly; pre-dawn is cold even in summer, and afternoon storms build — which can make dramatic skies if you shoot them safely.
- Sturdy, closed-toe footwear for uneven rock and short hikes to viewpoints, plus something you don’t mind getting wet at the reservoirs.
- A stocked car — chargers, a paper map or offline maps (cell service is thin), snacks, spare layers, and a basic emergency kit for the miles between towns.
- Filters and cleaning supplies if you use them — a polarizer for water and skies, and dust-blower and cloths for the ever-present grit.
Because you’ll move between town, overlooks, the monument, and possibly the mountains, keep a stocked trunk as your mobile base — spare water, snacks, layers, and a place to swap gear mean a hot, cold, or tired photographer is never stuck. For a full, season-by-season breakdown, see our what to bring guide, and for tour-day dressing, what to wear.
Seasonal Considerations
The same photography weekend becomes a different trip depending on when you come, and the smart move is to plan the trip the season actually gives you rather than the one you imagined. The unifying rule: pair your subject and elevation with the calendar, and plan the drive around mountain weather. Because conditions, foliage, and access shift year to year, treat the notes below as general guidance and confirm specifics.
- Spring brings a reawakening landscape, moving water, and thinner crowds than summer, though conditions can be variable and the high country is still melting out and muddy. It’s a lovely, quieter time for the canyons and close reservoirs; mountain passes on the drive can still see winter weather, and high-elevation locations may not be open yet.
- Summer offers the longest shooting days and full access to the High Uintas, plus warm reservoir scenes — but the trade-offs are harsh midday light, the biggest crowds (book lodging early), and afternoon thunderstorms you’ll want to be off exposed overlooks for. Those same storms, shot safely from a distance, can make the most dramatic skies of the year.
- Fall is the quiet favorite for many photographers: comfortable temperatures, changing foliage in the high country, softer light, thinner crowds, and long golden hours. The trade-offs are shorter daylight (plan the drive and the sunrise earlier) and a closing window in the high country as snow returns.
- Winter reshapes the region into a stark subject of snow, shadow, and low light, and demands real caution on the mountain drive and around the cold. It’s a specialized season with beautiful, quiet frames for those prepared for it — plan carefully and check conditions closely. See our winter hiking guide for cold-weather footing.
Spring vs. Summer vs. Fall
The three main shooting seasons make genuinely different weekends. Here’s how they compare for planning.
| Spring | Summer | Fall | |
|---|---|---|---|
| Light & feel | Fresh, variable, reawakening; quieter | Long days, harsh midday; the busy season | Soft light, long golden hours; the quiet favorite |
| Landscape | Moving water, green returning, dramatic skies | Warm reservoirs; storm skies in the afternoons | Foliage in the high country; crisp, clear air |
| High country & access | Still melting out; some locations closed | Fully open — the window for the High Uintas | Beautiful but closing with early snow |
| Crowds | Thinner | Busiest — book early, shoot early | Thinner, quieter overlooks |
| The drive | Passes can still see winter weather | Long daylight; watch afternoon storms | Shorter daylight — leave and shoot earlier |
Budget Considerations
A photography weekend in Vernal scales easily from inexpensive to comfortable, and knowing where the money goes helps you plan the trip you actually want. The region’s great advantage is that most of the photography itself — overlooks, canyons, reservoirs, scenic drives, the night sky — costs little beyond fuel and modest day-use or entrance fees. Here are the pieces to budget for, without inventing numbers that change:
- Lodging — a Vernal hotel is the flexible default and puts you central for pre-dawn departures in any direction; camping is typically cheaper and positions you for both the night sky and the next sunrise. Rates and availability change and peak in summer — reserve early.
- Fuel — photography weekends are drive-heavy, with early runs to sunrise spots and evening runs to sunset spots, so factor real mileage and fill up in town before heading out; services thin between towns.
- Day-use and entrance fees — state parks and the national monument charge fees that change and are set by the managing agencies. Confirm current amounts. VERIFY WITH OFFICIAL SOURCE.
- Permits (only if applicable) — ordinary personal photography generally needs none, but commercial shoots, workshops, drones, and some gear use can require permits with their own fees and lead times. Confirm well ahead if your work is anything beyond personal.
- Food — packing coolers and quick meals keeps costs down and, more importantly, keeps you out shooting through the good light instead of tied to restaurant hours; town dinners add comfort at the end of the day.
- Gear you rent or replace — if you’re renting a lens or a sturdier tripod for the trip, budget it; night and low-light work here rewards the right glass.
- One planned adventure (optional) — a guided UTV tour is $349 per machine (up to 2 riders, 3 hours), with a $125 ride-along and a $99-per-hour extension. It’s the one fixed splurge that also delivers access to photography you can’t reach any other way.
The takeaway: a camp-and-cook, self-guided photography weekend is genuinely affordable, while hotels, rentals, and a guided tour add comfort and reach. Dial it to your group — and because fees and rates change and are set by the providers, confirm current specifics before you budget.
Planning Tips
Pull the whole weekend together into a few simple habits, in the order the decisions come:
- Lead with one interest. Decide whether this is a landscape, geology-and-history, night-sky, wildlife, or mixed weekend before anything else. Everything follows from that one call. Use the table above.
- Choose two or three locations, not ten. Depth beats breadth. Work a few places in good light rather than racing a checklist and shooting everything at noon.
- Plan backward from the light. Pick a sunrise location and a sunset location first; fill the harsh midday with petroglyphs, forest, the museum, scouting, and driving.
- Basecamp in Vernal. Unpack once and drive out — it’s the low-friction way to reach a region built like a wheel, and it saves your energy for the shooting.
- Scout in flat light. Use arrival evening and midday to find your compositions, so you’re set up and calm when the light turns.
- Check the sky before you commit. Look up sunrise and sunset times for your exact dates, watch the weather, and — for astrophotography — the moon phase. VERIFY WITH OFFICIAL SOURCE and a current almanac.
- Confirm night access in advance. Don’t assume you can be at a location after dark; night access is restricted at some sites. Confirm before you drive out.
- Leave slack for the light and weather. Don’t over-schedule; the best frames come from patience and revisits, not a packed itinerary.
- Match the season, and plan the drive around it. High country in summer, foliage in fall, quiet canyons in spring, careful caution in winter — and always plan the mountain drive around the weather.
- Respect the resource. Stay on trails, keep your distance from wildlife, and never touch, chalk, or climb on rock art or fossils. Confirm any drone and permit rules before you shoot. VERIFY WITH OFFICIAL SOURCE.
Common Mistakes
A few predictable missteps turn a promising photography weekend sour. They’re all easy to avoid once you know them.
- Trying to photograph every location in one weekend. The region’s variety tempts people into a frantic checklist and a portfolio of noon snapshots. Pick two or three locations and work them well; the rest will still be here next time.
- Shooting the best subjects in the worst light. Arriving at a grand overlook at midday and leaving before sunset wastes the location. Plan the headline landscapes for the edges of the day.
- Not scouting first. Showing up at a new spot exactly at sunrise and scrambling for a composition usually means missing the light. Scout in flat light so you’re ready when it turns.
- Assuming access, roads, or night entry. Roads, overlooks, gate hours, and after-dark access change and are set by the agencies. Never build a shoot around a specific road or a night location without checking it first. VERIFY WITH OFFICIAL SOURCE.
- Ignoring the moon and the weather. Planning an astrophotography night under a full moon or a cloudy sky is a wasted drive. Check both before you commit.
- Over-scheduling the days. A weekend has room for a sunrise, a sunset, and one or two midday anchors — not five stops a day. Leave slack for patience and revisits.
- Under-packing power and storage. Dead batteries and full cards end more shoots than bad light. Bring far more of both than you think, and keep batteries warm.
- Disrespecting the resource. Trampling off-trail for a shot, crowding wildlife, or touching rock art damages the very thing you came to photograph — and can be illegal. Keep your distance and stay on trails.
Decision Framework
When you’re not sure how to shape the weekend, work through these questions in order — each one narrows the plan.
1. What do you most want to photograph? Landscape, geology and history, night sky, wildlife, or a beautiful mixed weekend? This single answer sets your locations, your hours, and everything else. Lead with one; treat the rest as bonuses.
2. Is photography the whole goal, or part of a bigger trip? A photography-first weekend bends entirely around the light and revisits. A mixed-adventure weekend shares the days with sightseeing, hikes, drives, and a UTV tour. Decide honestly which one you’re planning.
3. How many nights can you protect? One night suits a single, focused location close to town. Two nights — the sweet spot — gives you two sunrises, two sunsets, and time to work more than one location. Three opens the fuller region and gives the weather and the night sky room to cooperate.
4. Sunrise-focused or sunset-focused? If you love calm, uncrowded, soft morning light and can do the early alarms, lean sunrise. If a group and a relaxed pace matter more, lean sunset and blue hour. Most weekends do some of both — see the comparison below.
5. What season are you coming in? Let it set your subjects and your access — summer for the high country and long days, fall for foliage and soft light, spring for water and quiet, winter for stark, careful cold-weather work — and plan the drive around the weather.
Sunrise-Focused vs. Sunset-Focused Itinerary
Which end of the day you build around changes the whole rhythm of the weekend. Here’s the honest comparison.
| Sunrise-Focused | Sunset-Focused | |
|---|---|---|
| Light & conditions | Calmest air, softest light, still water | Warm directional light, dramatic skies, easy blue hour after |
| Crowds | Fewest people — often the location to yourself | More people at popular overlooks |
| Best subjects | Reservoir reflections, wildlife, east-facing rock | West-facing canyons and overlooks, big skies |
| Cost to you | Very early alarms and pre-dawn drives | Late finishes; pairs naturally with dinner |
| Group friendliness | Harder — best done solo or with keen shooters | Easier — everyone can join before or after a meal |
| Best for | Dedicated photographers chasing quiet, quality light | Couples, mixed groups, and a relaxed pace |
Two Nights vs. Three Nights
The most common length question deserves its own comparison.
| Two Nights (the classic) | Three Nights (the fuller trip) | |
|---|---|---|
| Shape | Friday evening in, Sunday afternoon home | Add Sunday night, drive home Monday |
| Light windows | Two sunrises, two sunsets, one clear-night shot | Three of each — real margin for weather to turn |
| Covers | Two or three locations worked well | Multiple areas plus revisits — no rushing |
| Reach | Close reservoirs, the monument, one grand landscape | Deeper Flaming Gorge, the High Uintas, remote geology & rock art |
| Best for | Most weekenders and first visits | Dedicated photographers, astrophotography, chasing a condition |
| Pair with | This guide, the romantic weekend | The 3-day adventure itinerary |
Photography-First vs. Mixed-Adventure Weekend
Finally, the choice that most shapes the feel of the trip — and the one that decides whether a mixed group comes home happy.
| Photography-First Weekend | Mixed-Adventure Weekend | |
|---|---|---|
| Priority | Bend the days entirely around the light | Photography anchors the trip but shares the days |
| Best group | Dedicated photographers | Couples and groups where not everyone shoots |
| Rhythm | Pre-dawn starts, revisits, patient waits | Edge-of-day shooting; shared midday sightseeing |
| The other half | Minimal — scouting and driving between light | Monument, hikes, scenic drives, a UTV tour, a swim |
| Risk to manage | Burnout; non-shooters feeling dragged along | Thin photographic results if the light is never protected |
| Payoff | Serious frames in the best light | Everyone remembers the weekend fondly |
Most groups are happiest somewhere in between — a real photographic anchor at each end of the day plus shared, non-shooting highlights in the middle. The gift of Vernal is that the same weekend serves either end of this spectrum without changing its bones: base in town, choose your locations, and shoot the edges of the light while the landscape keeps everyone else busy.
Final Recommendations
Planned well, a photography weekend in Vernal and Dinosaur Country gives you something most photo destinations can’t: real variety of subject within an easy radius, and a trip that works whether you’re a dedicated landscape shooter, a night-sky chaser, or a couple where only one of you carries a camera. The whole thing comes down to a handful of decisions made before you leave home — lead with one interest, choose two or three locations, plan the days backward from sunrise and sunset, and leave slack for the light and weather to cooperate. Scout in flat light, respect the resource, and match the trip to the season and the drive.
For most people, the ideal shape is a two-night weekend: a committed sunrise at your headline location, midday spent on the monument and petroglyphs and scouting, sunsets and blue hours at the canyons and overlooks, and — if the sky is clear — a night under some of the darkest skies in the country. Keep the pace honest, protect the drive home, and remember that the photographers who go home happiest are the ones who came for the region, not just one perfect frame — the great sky is the bonus.
When you’re ready to add the experience that a photographer remembers most, a guided backcountry UTV tour with Adventure Tours Vernal ($349 per machine, up to 2 riders, 3 hours) carries you into canyon country, arches, and remote rock art you could never reach on your own, with Dave and Trudy handling the driving and the storytelling — the ideal way to photograph country that’s off-limits to ordinary vehicles. Call (435) 219-9447 to check availability. For more ways to shape the trip, explore the Itineraries hub, the Scenic Drives hub, and our photography hikes near Vernal, and because so many of the details that make or break a photography trip change constantly, always VERIFY WITH OFFICIAL SOURCE before you finalize.