Key Takeaways
- Two photographic worlds, one base. From Vernal you can shoot warm red-rock canyons one day and cool alpine lakes and dark night skies the next — a range of subject and light few destinations can match.
- Light is everything, and timing is the whole game. The golden and blue hours at dawn and dusk transform this landscape; flat midday light does it few favors. Hike into the good light and beat the heat and storms at the same time.
- Some of Utah’s darkest skies. Away from major-city glow, the High Uintas and remote monument country deliver extraordinary star and Milky Way photography — with real cold-and-dark risk that demands scouting and preparation.
- Shoot responsibly, always. Stay on durable ground, never touch or alter fossils, rock art, or wildlife, keep a wide distance from animals, and follow all rules — including drone and tripod restrictions that vary by area and must be verified.
- Never promise the light. Weather, clouds, wildlife, and conditions are never guaranteed. Come for the experience and the changing light, work the hours patiently, and treat every great frame as earned — and verify the details that change with the managing agency.
Why Photograph Dinosaur Country
Most photographers arrive in this corner of northeastern Utah for one picture — the dinosaur bones, a red-rock overlook — and leave with a memory card full of images they never expected. That surprise is the whole point. Photography hiking near Vernal is special for a reason that has little to do with luck and everything to do with geography: in a single, compact region you can hike through several completely different landscapes, each with its own subject matter, palette, and quality of light, without ever driving far. Few places let you shoot a warm sandstone canyon at sunrise and a mirror-still alpine lake at sunset in the same trip.
The engine behind that variety is elevation. The region sweeps from the warm, dry canyons and sagebrush flats around the monument up into the cool forests, meadows, and tundra of the High Uintas — a rise of thousands of feet that stacks a whole ladder of landscapes into a small area. Down low, the subject is the desert: red and buff sandstone, layered cliffs, river canyons, sculpted rock, and the big skies of the Colorado Plateau. Up high, it flips to an alpine palette of granite, spruce, wildflower meadows, and cold clear water. In between, the river corridors and reservoirs add reflections, shoreline, and wildlife. Hike the ladder and you photograph them all.
There’s a subject here you’ll find almost nowhere else, too: deep time made visible. This is dinosaur country in the literal sense — a landscape where the rock itself tells a story hundreds of millions of years long, where fossils and ancient rock art sit in the same frame as the living desert. Photographing here is a chance to make images with a genuine sense of place and time, not just another pretty overlook.
And then there’s the quieter gift: space, solitude, and dark skies. This is uncrowded country. Away from the marquee sites you can often work a whole canyon or lake basin without another photographer in the frame — no jostling for the tripod spot, no waiting your turn at the overlook. That same emptiness means the nights are genuinely dark, among the darkest in Utah, which turns the region into a night-sky destination in its own right.
Put those together — a ladder of landscapes, deep-time subject matter, water that adds reflection and life, and the quiet dark that lets the stars come out — and you have a place where hiking and photography are the same activity. This guide is the photography-focused companion to our broader hiking hub: where the Dinosaur National Monument hikes guide covers the monument’s trails and the alpine lakes hiking guide covers the high country, this one owns the art of hiking to make memorable photographs, responsibly — where to point the camera, when to be there, and how to shoot without doing harm. It is not a camera-buying guide, an equipment review, a trail database, or a photography course; it’s a planning guide to help you choose where and when.
Best Photography Hikes
The smartest way to plan a photography hike here is to first decide what kind of image you’re after, because the region spans everything from a warm desert canyon to a cold alpine lake to a star-filled night. Rather than name exact viewpoints and mileage — which change, and which the official sources describe best — here are the broad categories of photography hike the region offers, by character:
- Red-rock and canyon hikes. The trails around Dinosaur National Monument and its river canyons for warm sandstone, layered cliffs, sculpted rock, and deep-time landscapes (see Red Rock Landscapes, below).
- Alpine lake and meadow hikes. The lakes, basins, and wildflower meadows of the High Uintas for reflections, granite peaks, and cool mountain scenery (see Alpine Landscapes).
- Reservoir and river hikes. The shorelines of Red Fleet, Steinaker, and Flaming Gorge, and the river corridors, for water, reflections, wildlife, and the meeting of rock and water.
- Rock-art and interpretive hikes. Short trails to ancient petroglyphs and pictographs and interpretive sites, for images with a sense of human and geologic time (photograph only — never touch or chalk rock art).
- Wildlife hikes. Habitat-rich walks in both the desert and the mountains for animals and birds (see Wildlife Photography Opportunities).
- Night-sky hikes. Short, well-scouted walks to dark, open ground away from town for stars and the Milky Way (see Night Sky Photography).
The best “photography hike” is usually not the longest or hardest one — it’s the one that puts you in the right place at the right hour with room to work. A short walk to an open overlook at sunrise can out-shoot a grueling all-day march that lands you at a viewpoint under flat noon light. Match the hike to the light you want, keep your ambitions modest enough to actually be there for the golden and blue hours, and let the trail serve the photograph rather than the other way around. Because exact trails, viewpoints, and access change and are set by the managing agencies, VERIFY WITH OFFICIAL SOURCE for current conditions before building a day around a specific spot, and use the linked destination guides for the deeper trail planning.
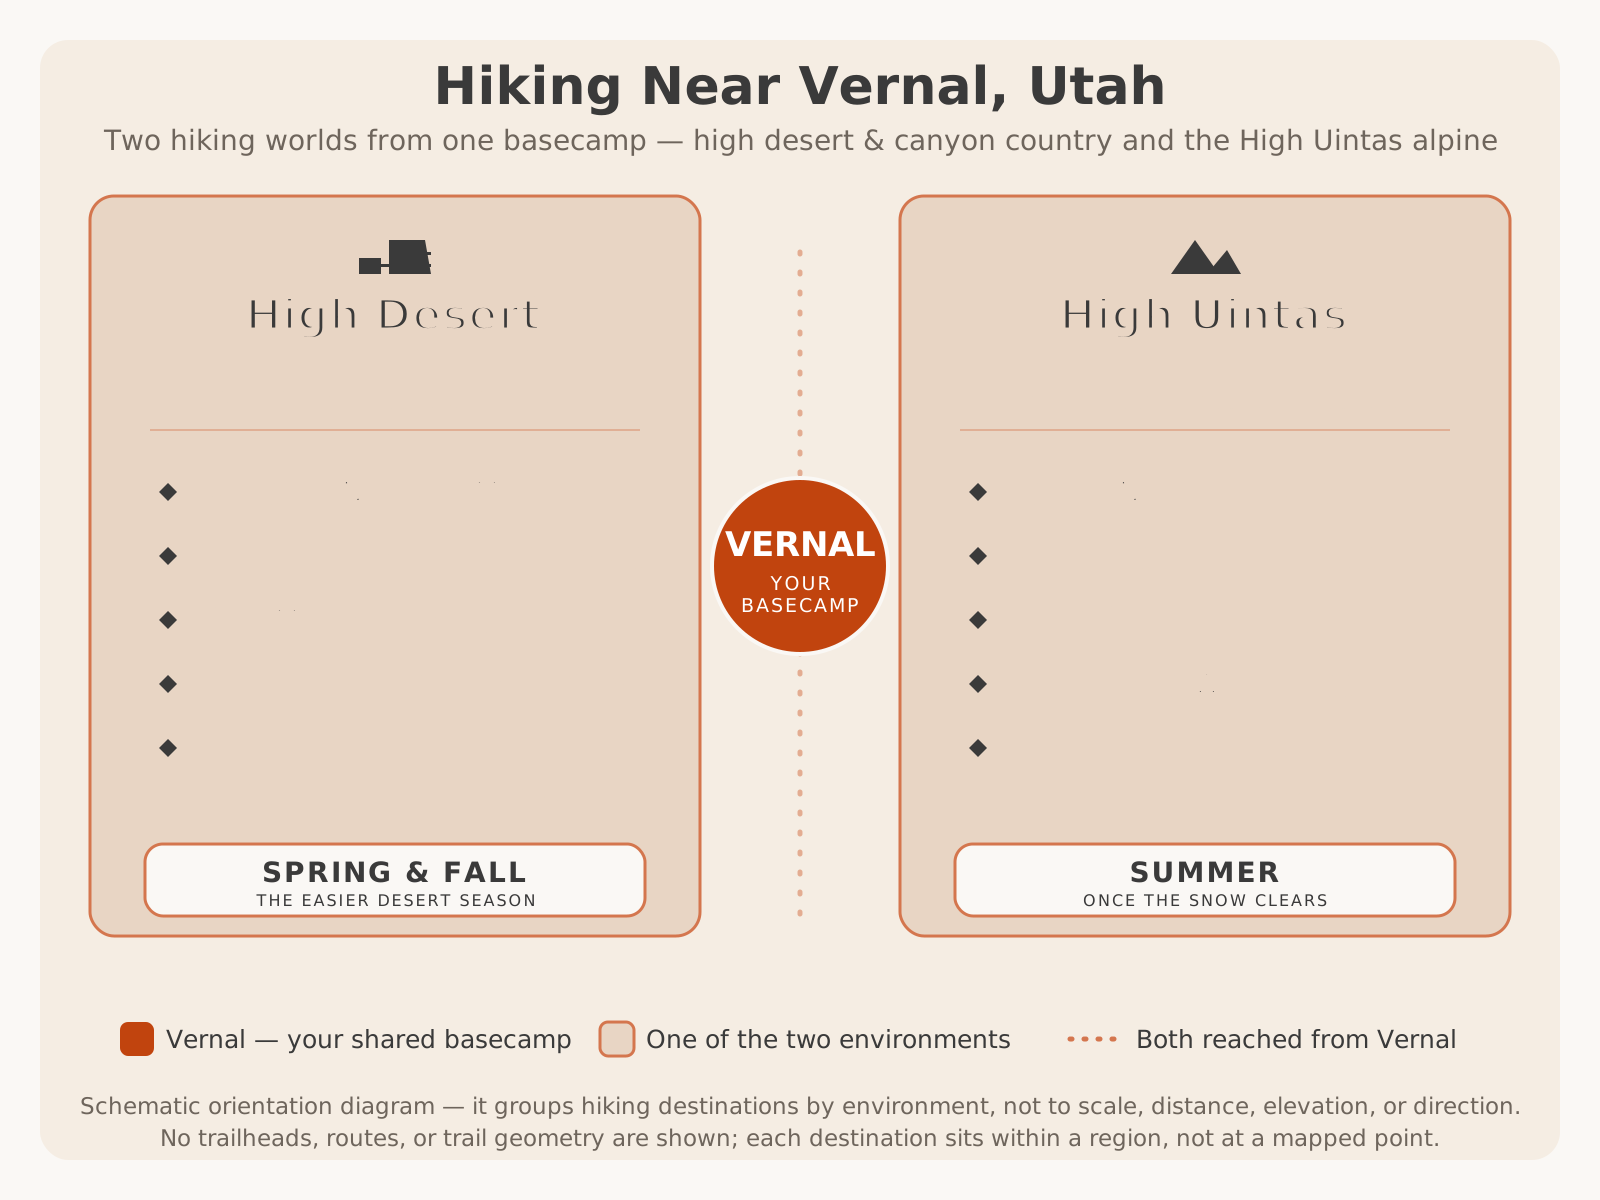
Those landscape categories fall along the region’s two hiking worlds — warm desert canyons low, cool alpine lakes high — and this is how they’re arranged around a single basecamp:
Red Rock Landscapes
The desert is where most photography hiking near Vernal begins, and it rewards a photographer who understands one thing above all: red rock is a creature of light. The same sandstone cliff that looks flat and dusty under the noon sun turns molten and glowing in the low, warm light of early morning and late evening, when raking light picks out every layer, ripple, and fracture in the stone. Learning to be there for that light is the whole craft of desert photography here.
The subject matter is extraordinary and varied. The country around Dinosaur National Monument offers layered cliffs and canyon walls in warm reds, oranges, and buffs; river canyons where the Green and Yampa cut through the rock; sculpted and tilted rock that tells the region’s deep geologic story; and the big, clean skies of the high desert that make such dramatic backdrops at dawn and dusk. Add the region’s signature subject — fossils and ancient rock art — and you have a landscape with a genuine sense of time that few deserts can match.
A few local instincts turn desert snapshots into keepers:
- Shoot the edges of the day. Morning and evening light gives red rock its glow and long, revealing shadows; midday light flattens it. Blue hour, just before sunrise and after sunset, wraps the desert in cool, soft tones that many photographers prize.
- Use the sky. High-desert skies — clean blue, building clouds, or a dramatic sunset — are half the picture. Watch the weather as a subject, not just a hazard.
- Look for layers and lines. The stone here is all about strata, fractures, and sculpted form. Use raking light and strong foregrounds to reveal them.
- Respect what you photograph. Never touch, move, or alter fossils, rock art, or rock to improve a frame, and stay off fragile desert crust (see Photography Ethics).
The desert’s real hazard for a photographer is not the rock but the heat, sun, and lack of shade, so the same early start that gives you the best light also keeps you safe. For the monument’s desert trails in depth, see our best hikes in Dinosaur National Monument guide, and because access, viewpoints, and any seasonal advisories change and are set by the managing agencies, VERIFY WITH OFFICIAL SOURCE (the National Park Service and Utah State Parks) before you go.
Alpine Landscapes
When summer bakes the desert, the high country offers a completely different photographic world — cooler, greener, and built around water, meadow, and stone. North and west of Vernal, the High Uintas and Ashley National Forest rise into forest, wildflower meadow, lake basin, and open tundra, and the palette shifts entirely: cold blue water, gray granite, dark spruce, bright meadow color, and the clean light of altitude.
The signature High Uintas image is a lake: mirror-still water at first light with granite peaks and spruce reflected in it, a wildflower meadow running down to the shore, and the cool depth of genuine alpine water. Because the range holds hundreds of alpine lakes across its high basins, the reflection shot is the region’s great alpine subject — and one you can reach on anything from a short walk to a half-day climb (see our alpine lakes hiking guide). Beyond the lakes, the high country offers wildflower meadows in the short summer bloom, granite and tundra in the long open views the Uintas are known for, and, crowning it all in the distance, Kings Peak at 13,528 feet, the highest point in Utah.
The alpine photographer’s craft turns on two things — light and stillness:
- Chase the reflections at first light. A still lake at dawn, with the high country mirrored in it, is the signature Uintas image — and the calm rarely survives past mid-morning, so get to the shoreline before the wind picks up.
- Build a foreground. Rocks, logs, wildflowers, or the lakeshore itself give a reflection depth and lead the eye toward the peaks.
- Work the meadows in bloom. For a few short weeks each summer, the meadows fill with wildflowers — a fleeting, high-payoff window that moves up the mountain as the snow clears.
- Be off exposed ground by early afternoon. The high country’s near-daily afternoon thunderstorms are both a safety hazard and, from a distance and a safe position, a dramatic subject.
Camera weight adds up fast at altitude even on a day hike, so pack thoughtfully, and always tread lightly on fragile alpine meadows and shorelines to get the shot. For the full range of alpine day hikes and lake basins, see our High Uintas day hikes guide, and because roads, trailheads, and areas open and close with the short mountain season, VERIFY WITH OFFICIAL SOURCE (Ashley National Forest) before building a day around a particular spot.
Desert vs Alpine Photography
The two worlds offer genuinely different photographic experiences, and the smart move is often to shoot both on a single trip — one for each kind of light and each palette.
| Desert Photography | Alpine Photography | |
|---|---|---|
| Where | Around Vernal, Dinosaur National Monument, and the reservoirs | Up in the High Uintas and Ashley National Forest |
| Signature subjects | Red rock, layered canyons, river gorges, fossils, rock art, big skies | Alpine lakes, reflections, wildflower meadows, granite peaks |
| Palette | Warm reds, oranges, and buffs; clean blue or dramatic skies | Cool blues, granite gray, dark spruce, bright meadow color |
| Best light | Golden and blue hours; raking low light on the stone | Calm first light for reflections; soft evening on the peaks |
| Best seasons | Spring and fall; summer at dawn only | High summer into early fall |
| Main watch-out | Heat, sun, and shadeless exposure — shoot early, carry water | Altitude and afternoon storms — start early, pack layers |
Wildlife Photography Opportunities
Wildlife adds a living subject to the region’s landscapes, and Dinosaur Country is unusually generous with it, because — just as with the scenery — it stacks several habitats close together. Down in the high desert, hikers commonly photograph mule deer, jackrabbits and cottontails, lizards on warm rock, and a rich mix of birds along the rivers, cliffs, and reservoirs. Up in the High Uintas, the cast shifts to marmots sunning on boulders, pikas in the talus, deer and elk in the meadows, moose in the willows and lakeshores, and an alpine community of birds. A patient photographer can build a remarkably varied portfolio here in a single trip.
Wildlife photography rewards the same habits as all wildlife watching, only more so. Dawn and dusk are prime — animals are most active in the cool, low light at the ends of the day, which is also the most flattering light for them. A long lens is essential, both for image quality and because it lets you keep your distance. Patience beats pursuit every time; the best images are of animals behaving naturally, undisturbed. And watch the edges — meadow rims, lakeshores, canyon bottoms, and reservoir shallows — where wildlife concentrates.
The one rule that overrides all the others is ethical, and it is non-negotiable: the animal’s welfare always outweighs the photo. Never bait, feed, call in, chase, or crowd an animal for a shot; give moose, elk, and any mother with young an especially wide berth; and if an animal stops feeding, freezes, or moves away because of you, you are too close — back off. Sightings are never guaranteed, because wildlife is wild and moves with season, weather, and chance. For the full art of hiking to see and photograph animals responsibly, see our dedicated wildlife hiking guide near Vernal, and because wildlife rules, closures, and advisories are set by the managing agencies and change, VERIFY WITH OFFICIAL SOURCE (the National Park Service, Utah State Parks, and Ashley National Forest) before you go.
Sunrise Photography
If there is a single best time to make photographs in Dinosaur Country, it is the window around sunrise — and not only for the light. The hour or two after dawn brings the warm, low, raking light that gives red rock its glow and long shadows, the calm air that lets alpine lakes lie mirror-still, and the soft blue tones of the pre-dawn blue hour that many photographers prize most of all. It’s also when wildlife is most active and the birds are at their most vocal, so a sunrise hike often delivers landscape and wildlife in the same outing.
Sunrise has practical advantages beyond the light. You’ll have the emptiest trails and easiest parking of the day, so you can work a viewpoint without crowds in your frame. In the desert, dawn is the coolest, safest window before the heat builds. And in the mountains, morning is the calm window before the afternoon storms, so shooting at first light keeps you off exposed ground when lightning threatens later.
The craft of a sunrise hike is mostly logistics. Scout your location the day before if you can, so you’re not searching for a composition in the dark. Arrive well before the sun — the best color often comes during blue hour, before the sun clears the horizon — which means hiking in with a headlamp. Watch the weather, because a few clouds often make a far better sunrise than a clear sky, while a fully overcast one may not color at all. And bring a tripod for the low light. Sunrise and sunset times shift every day and by location and season, so this guide won’t list them — check a current source for the exact time on the day and at the place you’ll be shooting, and give yourself margin to hike in and set up in the dark.
Sunset Photography
If sunrise is the photographer’s alarm-clock reward, sunset is the more sociable and, for many, the more dramatic end of the day. As the sun drops, the desert stone warms to its richest reds and oranges, the light rakes low across the canyons, the sky often builds far more color and cloud drama than a clear dawn, and — once the sun is down — the blue hour wraps everything in soft, cool light before dark. In the mountains, evening light on the peaks and a settling calm on the lakes can rival the morning’s.
Sunset’s great advantage is that it’s easier to catch — you can hike in during daylight, watch the light develop, and shoot without the pre-dawn alarm. Its great challenge is the reverse of sunrise’s: you’ll be finishing in fading light and often hiking out in the dark, so a headlamp, a known route, and a descent plan are essential. In the mountains especially, be sure the afternoon storms have fully cleared before you head up for an evening shoot, and be extra alert for wildlife on the trail and roads in low light.
A few sunset instincts help: stay past the sun. The best color and the blue hour often come after the sun has set, so resist the urge to pack up early. Watch behind you, too — the light opposite the sunset, and the alpenglow on peaks or cliffs, can be as good as the sunset itself. And plan the walk out before the light goes, so a great shoot doesn’t turn into a risky descent.
Sunrise vs Sunset
Both ends of the day are golden for photography here, and each has its own advantages — the best trips often use both.
| Sunrise | Sunset | |
|---|---|---|
| Light | Warm, clean low light; soft pre-dawn blue hour; often clearer skies | Rich warm light; often more dramatic color and cloud; blue hour after |
| Stillness | Best — calm air for mirror-still alpine reflections | Good, but afternoon wind may still be settling |
| Wildlife | Peak activity; birds most vocal | Strong — animals emerging to feed in cooling light |
| Crowds & parking | Emptiest trails; easiest parking; most solitude | Busier, but still quiet away from marquee sites |
| Storm safety (mountains) | Best — the calm window before afternoon storms build | Requires care — be sure storms have cleared before heading up |
| Main watch-out | A truly early alarm; hiking in and setting up in the dark | Finishing and hiking out in the dark — carry a headlamp |
Night Sky Photography
One of the region’s greatest and least-expected photographic gifts arrives after dark. Far from any major city’s glow, the High Uintas and the more remote parts of Dinosaur National Monument have some of the darkest night skies in Utah, which makes them outstanding country for star and Milky Way photography. Sit at an alpine lake after sunset and the silence is total and the stars overwhelming; the same darkness that makes the region feel remote is exactly what a night photographer wants. A clear, moonless night here can deliver images of the Milky Way — and, mirrored in a still lake, doubled — that simply aren’t possible near town.
But night photography is where the stakes rise sharply, because you’re now hiking, navigating, setting up, and moving in the cold and dark, often far from help and cell service. The rewards are real, and so are the risks. A short list of habits keeps a night shoot safe and productive:
- Scout in daylight. Choose and reach your location while you can still see, so you’re not finding a composition — or a cliff edge — in the dark.
- Plan around the moon and weather. A dark, moonless, cloud-free night is the goal for the Milky Way; a bright moon or clouds change everything. Season and moon phase determine when the Milky Way core is visible.
- Dress far warmer than the day suggests. Nights at altitude and in the desert get cold fast, and you’ll be standing still for long exposures.
- Carry a good headlamp and spare batteries (a red mode preserves night vision and your neighbors’ shots), and mind your footing near water, edges, and uneven rock.
- Don’t go alone into unfamiliar country at night, tell someone your plan, and carry a map you don’t have to charge.
For the gear side, night photography wants a sturdy tripod, a lens that opens wide, and a way to trigger long exposures without shaking the camera. Because any formal dark-sky programs, night access, and area rules are set by the managing agencies and change, VERIFY WITH OFFICIAL SOURCE (the National Park Service, Utah State Parks, and Ashley National Forest) for current access and rules before planning a night shoot — and never trespass or bend closure rules for a star image.
Seasonal Photography
Photography hiking changes character through the year, because the light, the color, and the access all shift with the seasons — and because the region’s elevation ladder means the “best” place to shoot moves up and down the mountain as the calendar turns. Matching your trip to those rhythms is how you find great images rather than flat light and closed roads.
Spring brings the desert to life as the country greens and warms — a comfortable, colorful season down low for red-rock and canyon work — while the high country is still snowbound and largely off the table. Summer splits the region in two: the desert bakes, pushing photographers to dawn shoots and cool-hour work, while the high country comes into its prime, with the alpine season running roughly July into September, wildflower meadows in bloom, full lakes for reflections, and the Milky Way arcing over dark skies on clear nights. Fall is many photographers’ favorite: the desert turns comfortable again, and up high the aspens turn gold, the low warm light lingers, and the crowds thin — a short, high-payoff window before the snows return. Winter quiets the region and turns most high-country trails over to snow, but a dusting of snow on red rock, and the long, low light of short winter days, can make striking desert images for those prepared for the cold.
Because most visitors shoot in summer and fall, and because those two seasons offer real trade-offs, it helps to compare them directly.
| Summer | Fall | |
|---|---|---|
| Desert photography | Best at dawn and dusk only; harsh, shadeless midday | Comfortable and rewarding more of the day; warmer low light |
| Alpine photography | Prime season; full lakes, wildflower meadows, green peaks | Gold aspens, clear air, quiet shores — but closing as snow returns |
| Night sky | Milky Way season on clear, moonless nights; mild nights | Excellent, darker earlier; colder nights, plan for it |
| Color | Green meadows, wildflowers, full water | Gold aspens, warm low light, dramatic skies |
| Crowds | Busiest window, especially school break | Thinner crowds; more solitude at viewpoints |
| Main watch-out | Desert heat; mountain afternoon storms | Early snow up high; cold mornings and nights; shorter days |
Photography Ethics
A camera in hand changes how a person moves through a landscape, usually for the worse — one more step for the angle, one more touch to “improve” the frame, one closer approach to the animal — so the first principle of photography here is also the most important: the place and its wildlife always outweigh the photo. A great image is never worth damaging the very thing that made it, and the best photographs of this country are honest ones: a place shown as it is, undisturbed, so the next photographer and the next generation find it intact.
That principle turns into a handful of concrete habits:
- Stay on the trail and on durable ground. Never trample fragile desert soil crust or slow-growing alpine meadows for an angle — the damage lasts for years and scars the scene for everyone after you.
- Never touch, move, or alter anything. Fossils, rock art, plants, rocks, and artifacts stay exactly as they are. Never chalk, wet, or trace rock art to make it “pop” — it’s irreplaceable and it’s illegal to deface.
- Keep your distance from wildlife. Use a long lens, never bait, feed, call in, or chase, and give every animal — moose and mothers with young especially — a wide berth. If it reacts to you, you’re too close.
- Follow every posted rule, including any tripod and drone restrictions. Drones are prohibited in many areas — national parks and monuments and designated wilderness commonly forbid them entirely — so never assume, and verify before you fly (see the FAQ).
- Pack out everything, leave no trace, and don’t build cairns, break branches, or move rocks for a composition.
- Skip the “Instagram spot” mentality. Chasing a viral location for the same shot everyone else has often means crowding, trampling, and trespassing. Trade it for patience, changing light, and images that are genuinely yours.
Held to these habits, photography becomes part of experiencing this country responsibly rather than a reason to bend the rules. Because specific photography, tripod, and drone rules are set by the managing agencies and change, follow all posted guidance and VERIFY WITH OFFICIAL SOURCE for the current rules where you’re shooting.
Weather & Light
Weather and light are the photographer’s two raw materials here, and reading them is the difference between a memorable frame and a flat one — while also being, quite literally, a safety skill. The region serves up two very different sets of conditions.
In the desert, the story is intense light and big skies. Much of the year the low country is hot, shadeless, and brilliantly clear, which is exactly why the harsh overhead light of midday flatters nothing and the warm, raking light of the golden hours transforms the stone. High-desert skies are a subject in themselves — clean blue, building clouds, or a dramatic sunset — and the weather that challenges you (heat, sun) also tells you when to shoot: early and late. In the mountains, the story flips to cool air and fast-changing skies, with near-daily afternoon thunderstorms in summer bringing lightning, wind, rain, hail, and a sharp temperature drop. Those storms are a genuine hazard on exposed high ground — and, from a safe distance and position, a dramatic photographic subject.
The response to both is the same discipline that also happens to give the best light: start early. An early start catches the desert’s cool golden light, lands you on the alpine lakes for the calm first-light reflections, gets you off exposed high ground before the storms build, and gives you the margin to work patiently and turn back with time to spare. The photographer’s edge, though, is learning to welcome imperfect weather: a few clouds make a far better sunrise or sunset than a clear sky, mist and storm light are gifts, and snow on red rock or fresh on the peaks can make the image of the trip.
Above all, stay flexible and check the most current local forecast close to your departure — the high-desert and alpine weather shift fast, and the light shifts with them. Because conditions change constantly, VERIFY WITH OFFICIAL SOURCE for current conditions before you go, and never chase a shot into dangerous weather. Our Vernal weather guide covers the region’s month-by-month patterns — heat, cold, and afternoon storms — in detail.
Family Photography Hikes
Photography and family hiking pair together beautifully, because a camera gives everyone — kids included — a reason to slow down, look closely, and notice the light, the animals, and the small details a hurried hike blows past. Dinosaur Country is unusually generous with easy, scenic walks that put a family within reach of genuinely photogenic scenes without a hard climb, so a parent with a camera and a child with curiosity can have an equally good day.
The winning family formula is to keep it short, early, and near the good stuff. Start with reservoir shorelines, short canyon and interpretive trails, and drive-up or short-walk alpine lakes, where the distance from car to picture is short and the scenery is close. Go early, both for the light and to beat the heat and storms. And turn photography into the activity: give kids a simple camera or let them use yours, make a game of finding reflections, animals, wildflowers, or interesting rocks, and let them be the ones to spot the shot. Kids who learn to look on a trail like this often keep it for life — and the family that’s watching the light together tends to have a better time than the one racing to a summit.
A few family-specific habits help. Match the hike to the youngest and slowest member, keep the whole group back from wildlife and away from edges and cold water, and don’t let excitement over a picture pull anyone off the trail or too close to an animal. Teach the same ethic the grown-ups follow — we photograph, we don’t touch, feed, chase, or disturb. For gentle, scenic, family-friendly trails and the full art of hiking here with children and multi-generational groups, see our dedicated family hiking near Vernal guide, and for more kid-focused ideas around town, things to do in Vernal.
Family-Friendly vs Advanced Photography Hikes
Photography hiking here spans a wide range, from gentle scenic walks perfect for kids to committing backcountry and night shoots for experienced photographers. Choosing the right end of that range for your group and goals is the key to a good day.
| Family-Friendly Photography Hikes | Advanced Photography Hikes | |
|---|---|---|
| Where | Reservoir shores, short canyon and interpretive trails, drive-up lakes | Remote desert canyons, high lake basins, dark-sky and night locations |
| Effort | Short, gentle, forgiving; scenery close to the trailhead | Long, rugged, high, or after dark; real distance from help |
| Best subjects | Reservoir reflections, easy overlooks, wildflowers, wildlife, rock art | Remote canyons, alpine reflections, the Milky Way, storm light |
| Best for | Families, casual and travel photographers, first-timers | Experienced, fit, well-prepared landscape and night photographers |
| Main watch-outs | Sun, heat, water, and keeping kids back from wildlife and edges | Altitude, storms, cold, dark, remoteness, no cell service, self-reliance |
| Payoff | Easy, genuine photographs close to the car | Solitude, wild scenes, and images few others come home with |
Accessibility
The good news for photographers with limited mobility or stamina is that some of the region’s most rewarding images are available close to the road, because the water, overlooks, and edges that make the best photographs are often reachable with little walking. Reservoir shorelines, developed day-use areas, drive-up viewpoints, short paved or well-graded interpretive paths, and roadside pullouts can put a photographer within reach of reflections, canyon overlooks, wildlife, and dark night skies — and a car itself makes an excellent, low-impact base for golden-hour and night shooting along the region’s scenic drives.
The most accessible photographic experiences tend to be the developed reservoir and river-access areas, short paved or well-graded interpretive paths, drive-up alpine lakes, and roadside viewpoints and pullouts, where you can work the light with a tripod close to the parking area. By contrast, the remote desert canyons and the high basins and wilderness trails cross uneven, rocky, sometimes steep ground and are not uniformly accessible.
Because specific accessible facilities, paved surfaces, viewpoints, and trail conditions vary by site and change over time — and because accessibility needs are personal — anyone in your group with particular mobility requirements should VERIFY WITH OFFICIAL SOURCE (the National Park Service, Utah State Parks, and Ashley National Forest) for the current accessible options before you go. Pairing an accessible viewpoint or shoreline with a slow, golden-hour scenic drive — such as the Red Cloud Loop or Cub Creek’s tour of the Tilted Rocks — is often the best way for a mixed-ability group to make photographs together from close to the road.
Packing Camera Gear
Photography hiking asks you to carry a camera and hike safely, which is a balancing act: too little gear and you miss shots, too much and the weight ruins the hike — and at altitude, camera weight adds up faster than you’d think. The goal is to pack for the images you’ll actually make on top of a solid hiking foundation, never at the expense of water, layers, and safety. This is a planning guide, not an equipment review, so rather than recommend specific gear, here’s the thinking:
- A tripod for low light. Sunrise, sunset, blue hour, and night photography all need stability. A tripod is the one photographic item that most changes what’s possible here — and it’s essential for the region’s dark-sky work.
- Lenses matched to your subjects. A wide view suits the big landscapes and the Milky Way; reach suits wildlife and distant peaks. Carry what fits your plan for the day, not your whole kit.
- Power and storage to spare. Cold drains batteries (keep spares warm), and long shoots fill cards — bring more of both than you expect to need, since there’s no resupply on the trail.
- Weather and dust protection. Blowing desert dust and sudden mountain rain both threaten gear; a simple rain cover and lens cloth go a long way.
- A comfortable way to carry it. A pack that protects the camera and rides well leaves you able to actually hike; a shot you’re too worn out to reach isn’t a shot.
- Everything after the “camera” is still a hike. The hiking essentials come first: more water than you think you need, layers and a rain shell, real sun protection, sturdy footwear, food, a map and navigation you don’t have to charge, a headlamp (essential for dawn, dusk, and night shoots), and a small first-aid kit.
Scale the camera kit up for a dedicated shoot and down to a single light setup for a family or casual hike — but never let gear crowd out the safety basics. For a full, season-by-season packing foundation, see our what to bring guide, and time your trip with the Vernal weather guide.
Planning Tips
Pull it all together into a simple, flexible photography-hiking plan:
- Plan the hike around the light, not the other way around. Decide what image you want — warm red rock, an alpine reflection, wildlife, the Milky Way — then choose a hike short enough that you can actually be there for the golden hour, blue hour, or dark, moonless night that makes it.
- Start early, every time. An early start buys the best light, calm water and reflections, empty viewpoints, active wildlife, and — above all — safety, letting you beat the desert heat and be off exposed high ground before the afternoon storms.
- Chase both light and comfort with elevation. Shoot the mild desert in spring and fall, go early on summer desert mornings, and head up to the cool High Uintas — for lakes, wildflowers, and dark skies — when the valley bakes. There’s rewarding photography somewhere near Vernal much of the year.
- Scout, then shoot. Find your composition in daylight, note where the sun will rise or set and where the shadows fall, and come back for the light. This matters most for sunrise and night shoots you’ll reach in the dark.
- Welcome the weather. A few clouds beat a clear sky for sunrise and sunset, and storm light, mist, and fresh snow can make the trip’s best frame — but never chase a shot into dangerous weather, and get off exposed ground when lightning threatens.
- Photograph responsibly, always. Stay on durable ground, never touch or alter fossils, rock art, or wildlife, keep a wide distance from animals, verify drone and tripod rules, and pack out everything. The best images here leave no trace.
- Base in Vernal and build a full trip. Vernal is the region’s gateway and nearest full-service town. Pair your photography hikes with camping in Dinosaur Country (great for dawn, dusk, and night shoots), a golden-hour scenic drive, and the rest of things to do in Vernal. Coming from out of state? See our Salt Lake City to Vernal guide.
- Verify the details that change — every time. Trail access, viewpoints, area and seasonal closures, seasonal road openings, permit requirements, and — critically — drone and photography rules are set by the National Park Service, Utah State Parks, and Ashley National Forest and change constantly, and sunrise and sunset times change daily. VERIFY WITH OFFICIAL SOURCE before you go, and read the companion guides: our best hikes in Dinosaur National Monument, alpine lakes hiking, High Uintas day hikes, and wildlife hiking, plus the Red Fleet and Flaming Gorge guides.
Approached with the right light, the right hour, and the right ethic, photography hiking near Vernal offers something rare: two complete photographic worlds — warm red-rock deserts and cool alpine high country, wildlife and reflections and dark, star-filled skies — within a single well-timed trip, and open to families and casual shooters, not just the hardcore. Hike into the good light, work it patiently, protect what you photograph, and let this remarkable country show you what it will. For animal-focused work, our wildlife hiking guide is the natural next step; for scenery-first hikers, the alpine lakes guide leads to the region’s most photogenic water. And when you want to trade the trail for a guided backcountry adventure into red-rock country you’d never reach on foot — camera in hand — book a UTV tour with Adventure Tours Vernal and let Dave and Trudy show you Dinosaur Country up close.